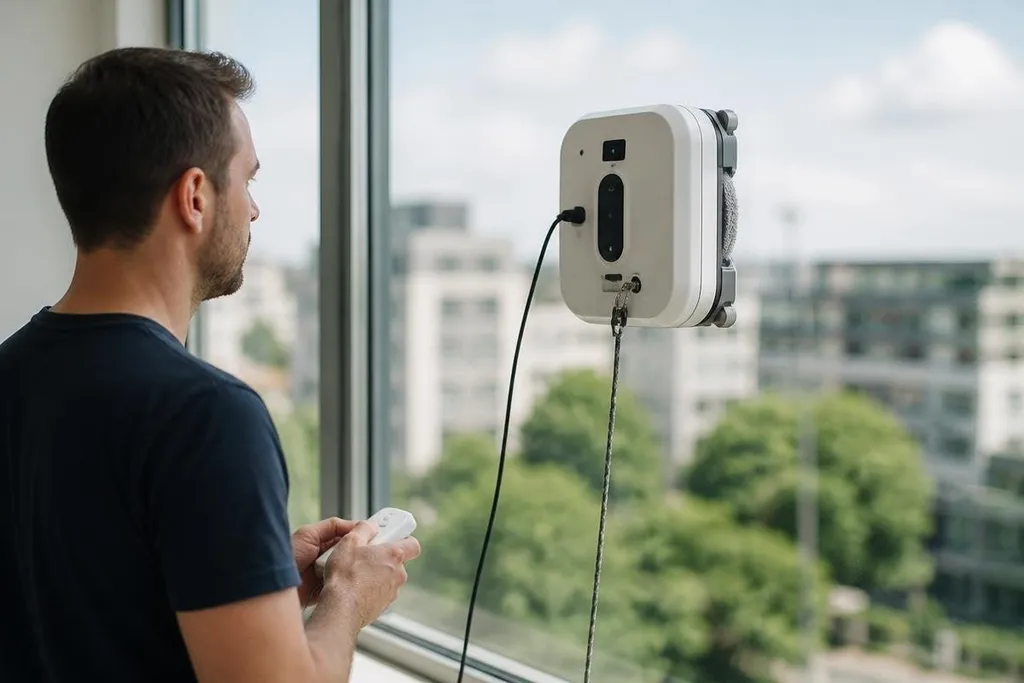
A window-cleaning robot sticks to glass with vacuum pressure, magnetic force, or both. It moves across the pane while a cleaning pad removes dust and marks, but the robot still needs a person to set it up and check its work.
This guide explains how the grip works, how the robot finds the window edges, and where these machines struggle.
- Grip comes first: suction or magnets hold the robot against the glass.
- Sensors map the pane: edge sensors help it avoid driving off the window.
- A safety line matters: the line catches the robot if power or adhesion fails.
How the robot stays on the glass
Most window-cleaning robots use a small vacuum motor. The motor pulls air from the space between the robot and the glass, creating lower pressure under the machine. Air pressure outside the robot then pushes it toward the pane.
The seal needs a fairly smooth surface. Dust, gaps, deep scratches, or a damaged pad can let air enter, reducing the grip. That is why the robot may work on a large glass pane but struggle on textured glass or a window with a heavy frame.
Magnetic models use one magnet on each side of the glass. The two parts pull toward each other through the pane, holding the cleaning pads against both surfaces. This design can work on glass that does not hold a vacuum, but it needs a suitable glass thickness and matching magnetic force.
The robot usually carries a power cable and a separate safety tether. The tether does not keep the robot attached during normal movement. It gives the machine a second line of protection if the motor stops, the pad slips, or the power supply is cut.
How it moves and finds the edges
Small drive tracks or wheels move the robot across the glass. Their rubber surfaces help transfer motor force to the pane while the cleaning pad wipes behind or between them.
Edge sensors detect changes at the border of the glass. The robot uses those signals, along with motor movement, to turn before its body reaches open space. Some models also detect frames, corners, and changes in surface contact.
This process works best on a broad, flat pane. A window with narrow sections, thick mullions, deep ledges, or an uneven frame gives the sensors less room to read the surface. The robot may stop, reverse, or leave a strip near the edge.
The cleaning path matters too. A robot that crosses the pane in repeated passes can cover a large area with less manual movement.
It still may need a second run for dried spots, bird marks, or dirt near the frame, because the pad can spread grime before it removes it.
That second run points to the evidence worth checking: a report should name the window-cleaning robot, its pad, suction system, frame sensors, and test result. Window-cleaning robot reports can put those details beside the claimed cleaning job, leading into what the cleaning system can handle and where it stops working.
What the cleaning system can and cannot do
The pad usually performs the final cleaning step. A dry pad can collect loose dust, while a damp pad can lift marks from the glass. The maker’s instructions matter because too much liquid can weaken the seal or leave streaks.
The machine also needs a clean starting area. If the pad is already dirty, the robot may move across the glass while carrying grit with it. That can leave lines behind and, on some surfaces, create scratches.
The machine cannot judge cleanliness like a person can. It follows its route and reacts to sensors. It may finish its path while a stain remains in one place, especially if the pad has dried or the mark needs more pressure.
I’d buy one for large, smooth panes that are hard to reach, not as a replacement for a person on every window. The safety line, setup time, frame design, and pad cleaning still decide how much work the robot saves.
Check these points before buying
Use this short guide before you put a robot on the glass:
- Glass surface: confirm that the maker supports smooth, flat glass and your window type.
- Grip method: choose vacuum adhesion for suitable smooth panes or magnetic holding for compatible double-sided cleaning.
- Edge layout: measure the usable glass around frames, corners, and narrow sections.
- Safety setup: check the tether length, attachment point, power backup, and instructions for outdoor use.
- Pad care: find out how often pads need washing or replacement and how much cleaning fluid the system allows.
The open question is the amount of manual work left after the robot finishes. If your windows have wide, flat panes and few marks, the machine may cut ladder work. If they have deep frames or uneven glass, hand cleaning may still be faster.